A backyard movie screen can be the right size and still fail if the seating is arranged from available space instead of sightlines.
The real layout decision is not how many chairs fit on the lawn. It is which seats get the clean viewing line, which seats stay low, and where people move once the movie starts.
Outdoor seating is less forgiving than an indoor theater row. Chair heights vary, blankets spread wider than expected, patio furniture drifts into the center, and someone eventually walks to the cooler during a quiet scene.
A layout that looks open while standing can block the screen once everyone sits down.
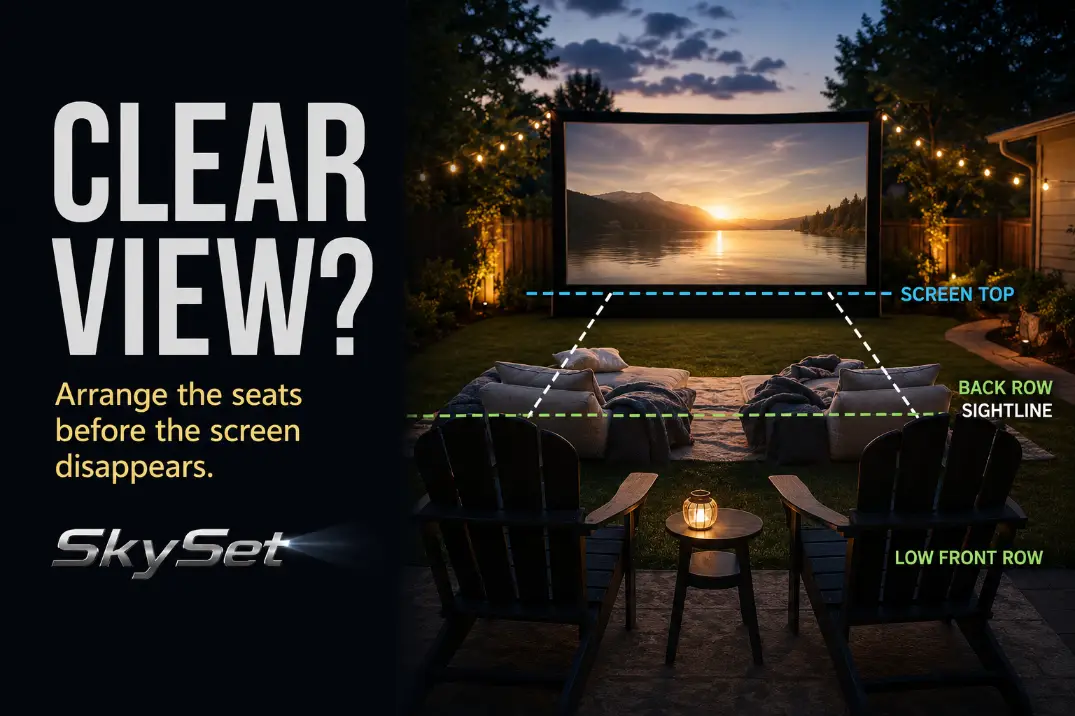
Build the seating from the screen view outward: low seats in front, taller seats behind, center view protected, side aisles left open, and every real seat tested from sitting height.
Keep Low Seating in the Front
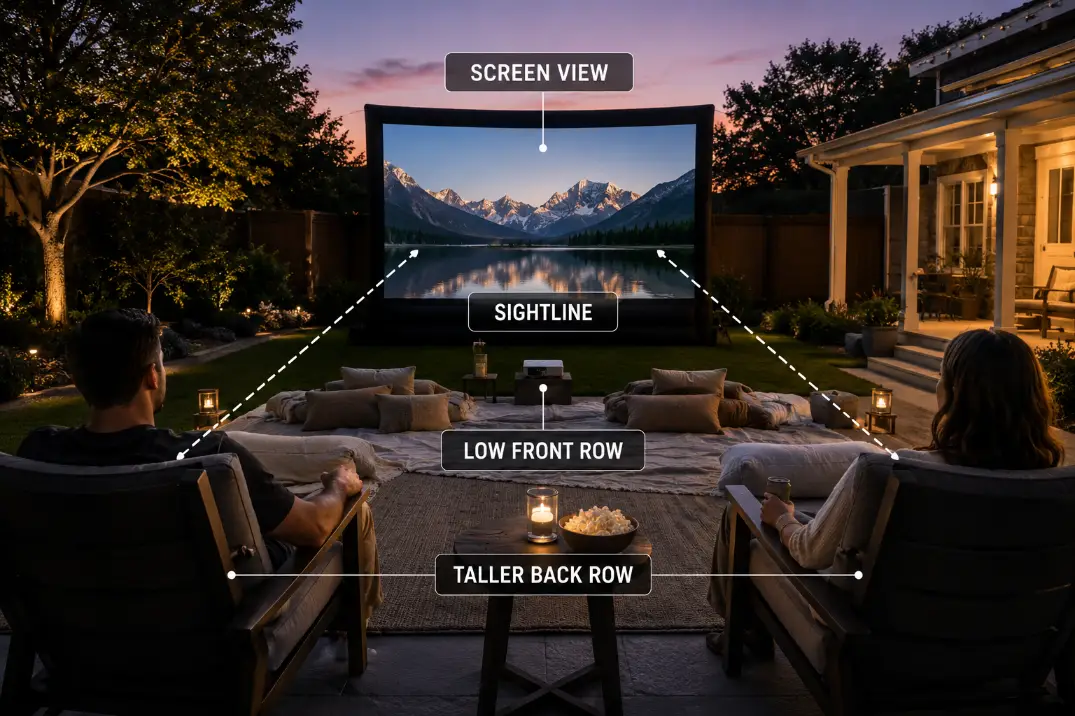
The front row should be the lowest row because it controls every view behind it. If upright camp chairs, dining chairs, or tall patio chairs sit closest to the screen, the back row has to watch through shoulders, chair backs, and shifting heads.
Low blankets, floor cushions, short loungers, and kids’ seats belong closest to the screen. They reduce blockage without forcing the back row to lean sideways all night.
This still needs restraint: low seating should not be pushed so close that people have to tilt their heads upward for the whole movie.
Keep the front row compact and centered. A blanket row that spreads too far beyond the screen can force the second row into awkward side angles. Extra side seating is fine, but it should not reshape the main viewing zone.
For a family setup, low front seating often feels natural because children are comfortable on blankets or floor cushions. The layout reason is still sightline control, not just comfort.
If the seating problem is part of a broader night with kids, snacks, and movement, use a separate family backyard movie setup for that wider planning layer.
Protect the Main Viewing Line
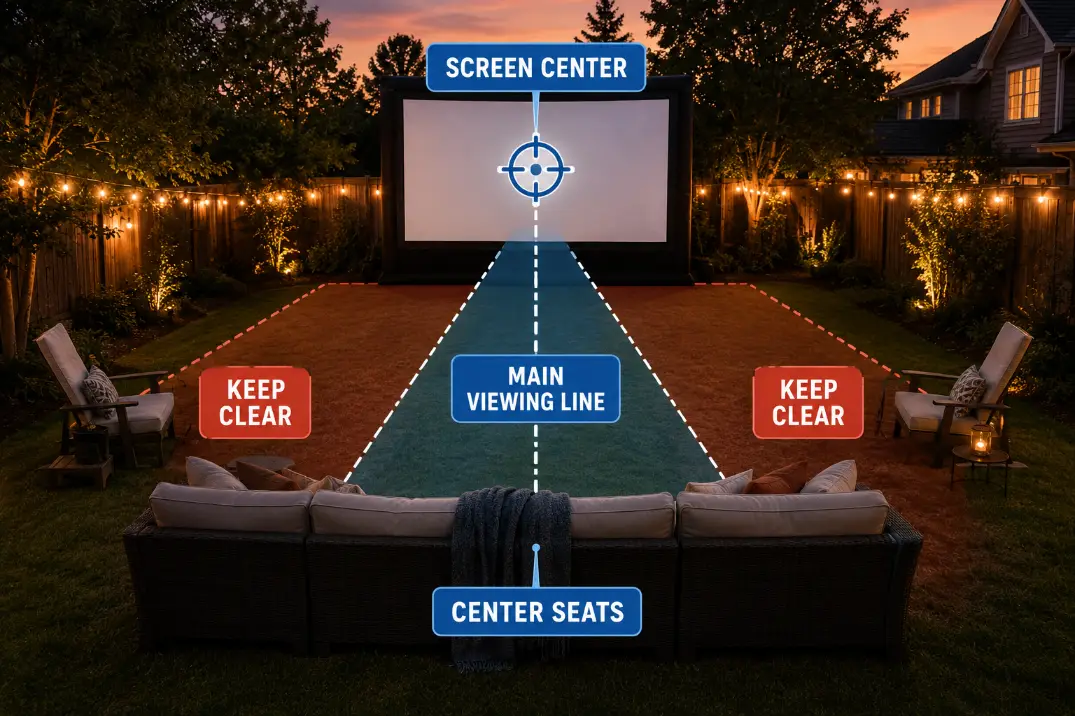
The main viewing line should be chosen before extra chairs are added. It runs from the central seating zone to the center of the screen, and it deserves more protection than the outer edges of the lawn.
Start with the seats that should have the best view: the main chair row, the central blanket area, or the primary seating cluster. Keep that line free of tall chairs, coolers, lanterns, small tables, speaker stands, and walking routes.
If something sits between the main seats and the screen, it becomes part of the movie whether you planned it or not.
Side chairs can work, but they should accept a side angle. They should not pull the whole layout wide enough that everyone is watching diagonally. A clean centerline matters more than filling every open patch of grass.
Screen size also affects how wide the seating zone can be. A larger image can support a broader group only when the centerline still feels natural. If the screen is too large for the yard, people may end up too close, too wide, or both.
When the seating zone and image size no longer match, check the best screen size for a backyard movie night before solving the problem with more chairs.
Leave Side Aisles Open
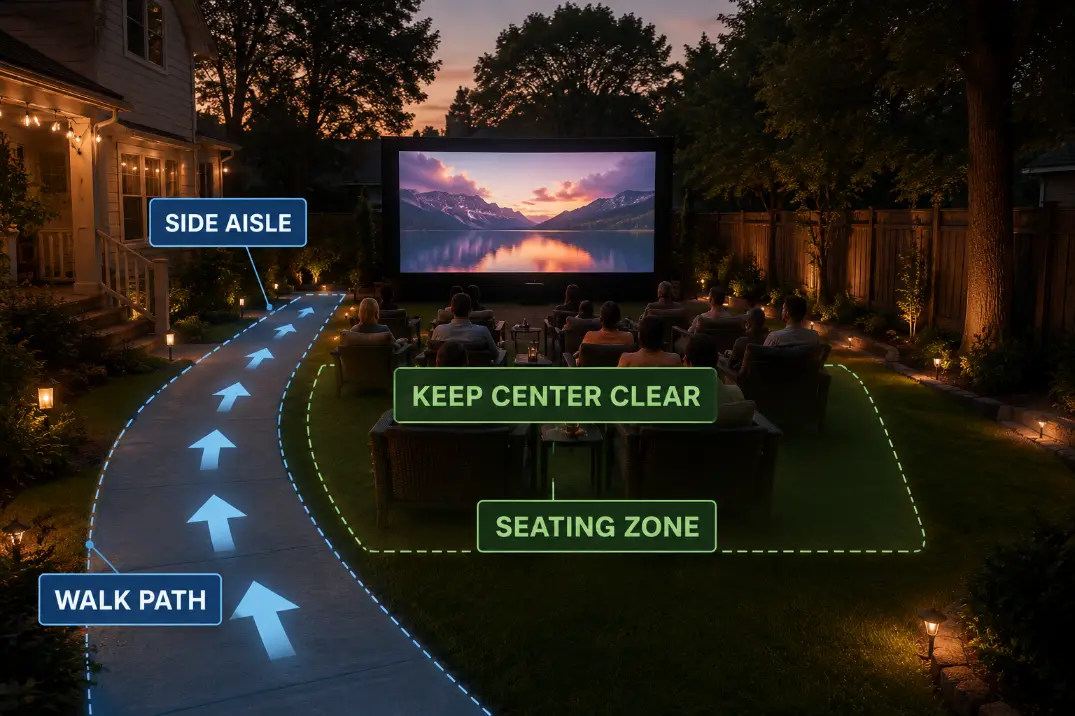
A seating layout fails in real use when the walking route cuts through the picture. The center should be for watching, not for reaching snacks, the house, the patio door, or the back row.
Keep movement along the sides of the seating area. Guests should be able to pass without stepping over blankets, chair legs, drink tables, or cords. In a small yard, even one repeated crossing can feel disruptive because the walking body is close to both the viewers and the screen.
Place coolers, snacks, fire pits, and extra tables outside the main viewing line. A side table may be slightly less convenient than one in the middle, but it will not keep breaking the image. Cords should also avoid the middle path when possible, though full cable routing belongs in a separate power or AV route plan.
For tight patios, the side aisle may decide whether the layout works at all. A compact setup with one clean movement route often performs better than a larger setup where every seat has to be climbed around.
That is especially true for outdoor movie setup on small patios, where seating and movement compete for the same narrow zone.
Raise the Back Row Only When Needed
Elevation is a correction, not the starting point. Most blocked back-row views should be tested first with lower front seating, staggered chairs, wider spacing, or a slight pullback.
A raised back row helps when the yard is flat, the group is deep, and people in back are looking through more than one row. Even then, the useful lift is usually modest. The goal is to clear heads, not create a backyard bleacher.
Avoid unstable height fixes. Loose crates, stacked cushions on chairs, or wobbly furniture can make the back row less comfortable and less safe than the view problem itself. If the row needs a better angle, move it back, stagger it between front seats, or widen it slightly before adding height.
A tall back row can also make the layout feel overbuilt. People may end up looking down over the front row instead of comfortably toward the screen. For casual movie nights, elevation should solve a specific blocked-view problem, not become the feature of the setup.
Permanent or semi-permanent theater areas can handle row height more deliberately. If the seating layout starts pushing you toward platforms, fixed rows, or long-term structure, compare that direction against a portable vs permanent backyard theater before building the whole plan around a raised row.
Avoid Chairs Too Close to the Screen
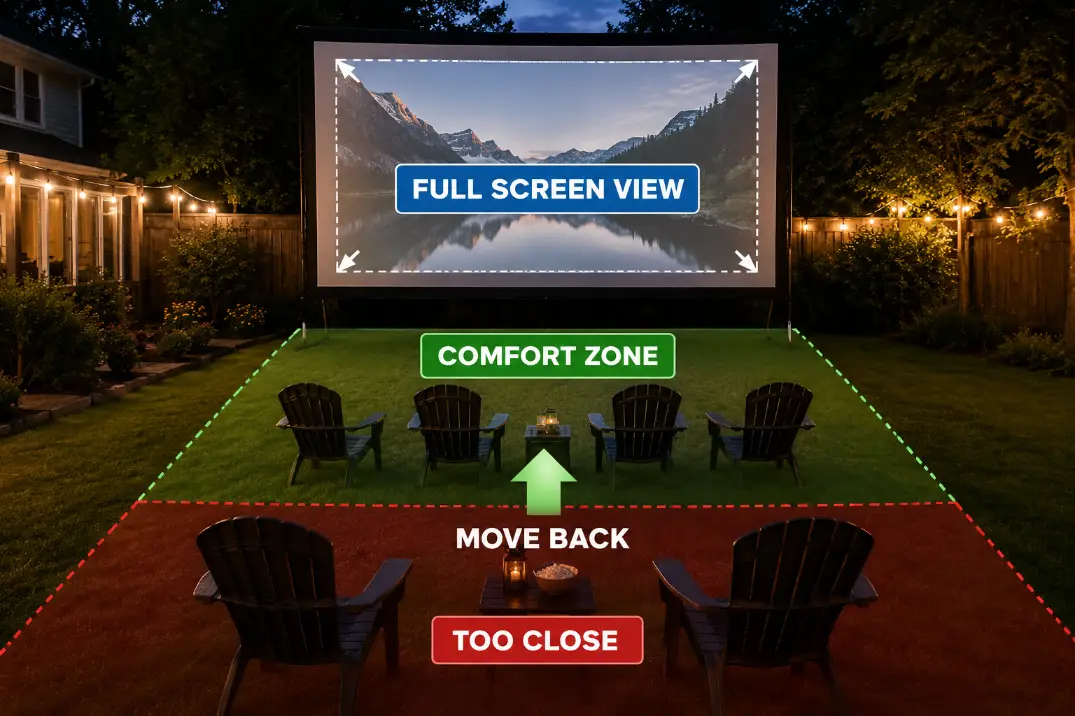
A clear view is not always a comfortable view. Moving chairs forward may help people see over the row in front, but it can create neck strain, edge scanning, and constant head movement.
The first row should see the full screen without looking sharply upward or turning from side to side. If people have to tilt back or keep scanning across the image, the seat is too close for that screen size.
This is where outdoor layouts can be misleading. A big screen may look impressive from the patio, but if it leaves no comfortable front-row distance, the layout is doing too much. In a smaller yard, a slightly smaller image can be better than forcing seats into the screen’s face.
Low seating still needs pullback. Blankets and floor cushions reduce blockage, but they do not cancel viewing comfort. A low seat directly under a large screen can be just as uncomfortable as a tall chair in the wrong place.
Do not use seat distance to compensate for a weak picture. If the image looks washed out, moving chairs forward may make it feel bigger, but it will not fix low contrast, patio light spill, or an image stretched too large for the projector.
Keep layout and picture quality separate, and check outdoor projector image visibility when the seating view is clear but the image still disappears.
Test the Layout From Every Seat
The final test has to happen from sitting height. Standing behind the chairs gives a false reading because your eyes are higher than the people who will actually watch the movie.
Start with the main row, then check the front row, back row, and side seats. Pay special attention to the awkward positions: the far side chair, the back corner, the low blanket edge, and any seat near a patio post, tree, fire pit, or table.
Use this quick pass before the movie starts:
- Sit in each real seat, not just the center chair.
- Check whether the full screen is visible without leaning.
- Look for tall objects inside the center viewing line.
- Walk the side aisle and make sure it does not cross the screen view.
- Test after dusk if possible, because darkness changes glare and contrast.
- Move the problem seat first before adding more chairs.
This test should lead to small corrections, not a full reset. Shift the tall chair behind the low row, pull the front blanket back, move the cooler to the side, or stagger the back row so heads do not stack in one line.
A strong seating layout is not the one with the most chairs. It is the one where the low front row stays low, the center view stays clear, the side aisle handles movement, and every real seat can see the screen from sitting height.
For a broader technical reference on viewing conditions and cinema sightlines, see the European Digital Cinema Forum’s Architecture Viewing Conditions guide.