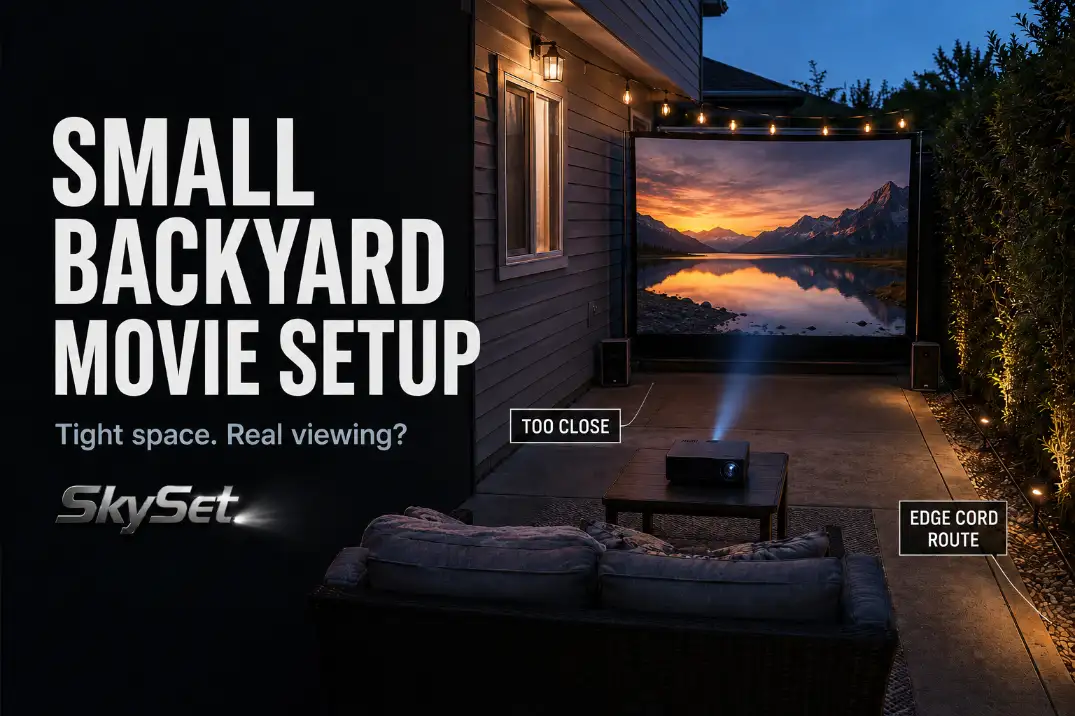
A small backyard movie night should be planned from the seating distance backward, not from the biggest screen you can squeeze against a fence.
If your first row is only 7 to 10 feet from the screen, the safest starting point is usually a 72- to 90-inch screen, one clean seating row, speakers aimed into that row, and a temporary power route kept along the patio edge.
The first checks are simple: can viewers sit at least about 1.2 times the screen width away, can the projector beam reach the screen without crossing heads, and can people walk from the door to the seats with about 30 inches of clear space?
This is different from a normal backyard theater problem. In a larger yard, brightness, screen size, and speaker power get more attention. In a small yard, geometry decides whether the night feels comfortable or cramped.
A projector can be bright enough and still fail because the screen is too large, the table sits in the walkway, or the sound points toward the fence instead of the seating zone.
Tight Viewing Distance
Start with the real seat-to-screen distance
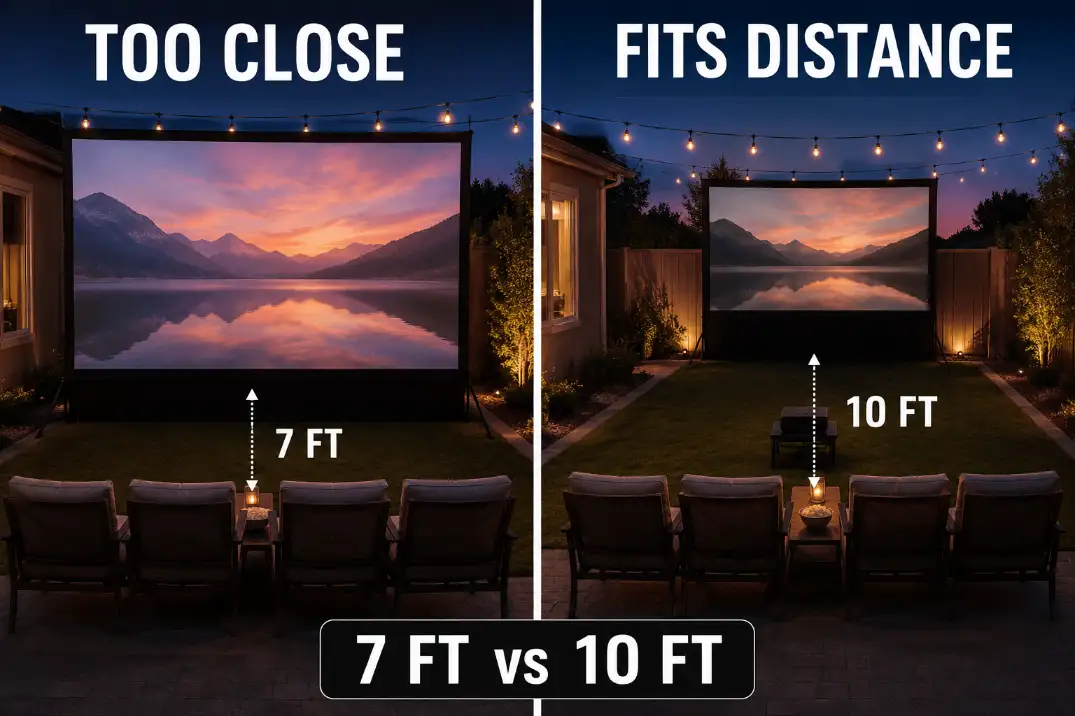
The most useful measurement in a small backyard is not the screen diagonal. It is the distance from the screen surface to the eyes of the first seated viewer.
Measure from the planned screen line to the chair back, then subtract a little for how people actually sit. A patio that looks like it has 10 feet may give you only 8.5 or 9 feet of real viewing distance once the chair angle, table, and screen base are in place.
For casual outdoor movie nights, a comfortable viewing distance is often about 1.2 to 1.6 times the screen width. That means a 100-inch diagonal 16:9 screen, which is about 87 inches wide, usually wants roughly 9 to 12 feet of viewing distance. If the first row is closer than that, the image may feel impressive at first and tiring after 20 or 30 minutes.
| Real viewing distance | Safer screen range | Risky choice in tight yards |
|---|---|---|
| 6–7 feet | 60–72 inches | 100 inches or larger |
| 8–9 feet | 72–90 inches | 110–120 inches |
| 10–12 feet | 90–100 inches | 120 inches if walkway is tight |
| 13+ feet | 100–120 inches | Usually depends more on brightness and screen stability |
When “cinematic” becomes uncomfortable
A screen is too large when viewers have to scan across it instead of relaxing into it. That is a symptom. The underlying mechanism is that the screen width has outgrown the viewing distance.
Keystone correction, zoom changes, or a brighter projector will not fix that.
This is where small backyard setups often go wrong: the screen fits the fence, but not the viewer. A 120-inch screen can look like the premium choice online, yet in a 9-foot seating zone it may make subtitles harder to follow, sports harder to track, and kids more likely to sit off to the side.
Setup Note: If the first row is closer than the screen width, reduce screen size before upgrading the projector.
Compact Screens
Smaller screens protect the whole layout
A compact screen is not a downgrade in a small backyard. It often solves several problems at once. A 72- to 90-inch screen can leave more room for the walking path, reduce wind movement, make speaker placement easier, and allow the projector to sit in a cleaner position.
The part people underestimate is the screen footprint. A freestanding screen is not just its fabric width. Support feet, side legs, guy lines, weighted bases, and frame hardware can add 12 to 24 inches of usable space on each side.
That matters if the screen sits near a gate, grill, planting bed, sliding door, or narrow patio edge.
Screen height matters too. In tight yards, people often hang the screen high on a fence because that is where it physically fits, but seated viewing comfort gets worse.
For many patio chairs, seated eye height is roughly 38 to 44 inches. The screen does not need to be perfectly centered at that height, but if viewers have to tilt their heads upward for most of a 2-hour movie, the screen is too high or too large for the layout.
For broader setup fundamentals, Best Backyard Movie Setup is useful, but a small backyard needs a stricter version of those rules. Every piece has to earn its space.
Avoid screens that create a second problem
Inflatable screens can work in larger yards, but they are often awkward in tight spaces. The blower needs room, the screen has depth, and the whole structure can shift in wind. Pull-up screens and collapsible frame screens are usually easier to control for a compact movie night.
A wall or fence projection can also work, but only if the surface is flat enough and not hit by stray light.
A white garage door may seem convenient until panel seams, hardware, or a nearby security light become visible during dark scenes. In small spaces, a slightly smaller clean screen usually beats a large imperfect surface.
Short Throw Problems
Short throw helps only if the table has a real place to sit
Short throw projectors are popular for small yards because they can create a larger image from less distance. That helps, but it does not remove the need for a working equipment zone.
If the projector table sits in the only walking path, blocks the first row, or forces people to step around the beam, the setup is still poorly placed.
Many short throw projectors need roughly 3 to 6 feet from the screen, depending on the model and image size. That distance sounds easy until the only centered position lands exactly where people walk from the back door to the seats.
Ultra short throw projectors are even more sensitive because screen ripple, table height, and uneven surfaces show up quickly outdoors.
A common wasted fix is buying a brighter projector when the real issue is placement. Brightness helps when the image is washed out by ambient light. It does not fix a projector that is off-axis, too low, blocked by heads, or sitting where guests need to walk.
For a deeper look at placement mistakes in compact areas, Small Patio Projector Placement Problems covers the same failure pattern in tighter patio layouts.
Test the beam path before arranging chairs
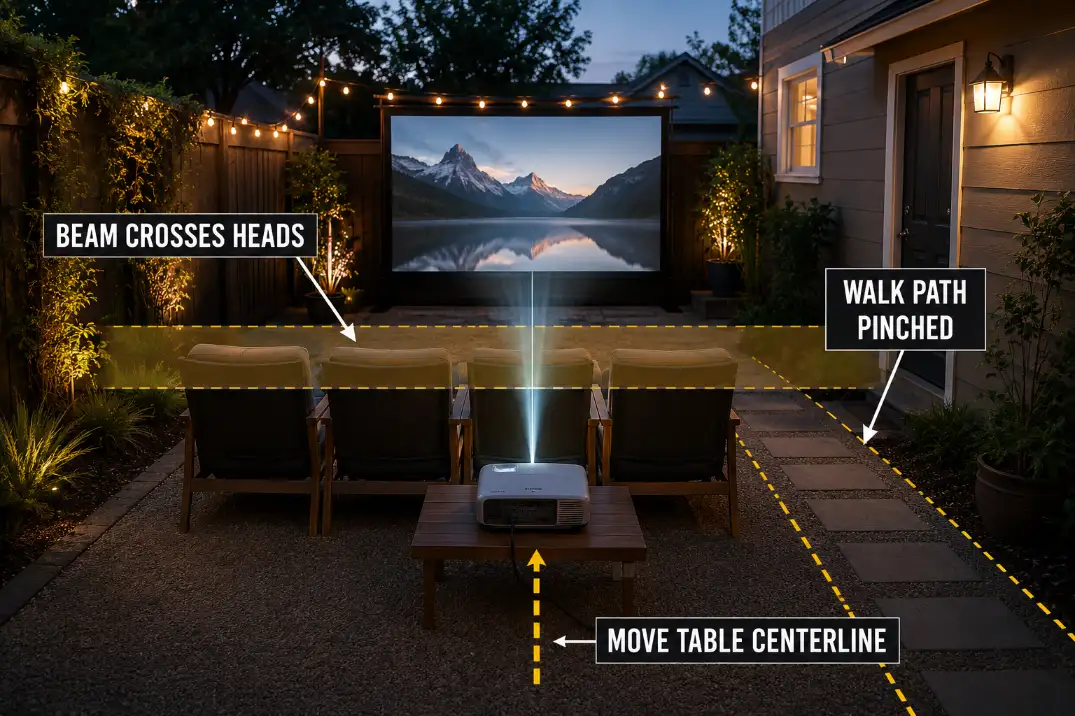
Set the projector in its real position, turn on a test image, and walk the normal route from the door to the seats. Do this for at least 10 minutes before guests arrive.
The test is not just whether the image fills the screen. It is whether the beam crosses head height, chair backs, drink tables, pets, or the main path.
If one person standing up blocks the image every few minutes, the projector is not in a usable position. Move the table closer to the screen, center it better, reduce screen size, or rotate the layout before trying to solve it with settings.
Speaker Placement
Dialogue clarity matters more than volume
Small backyards rarely need huge speakers. They need speakers that cover the seating zone evenly. A single speaker near the projector can sound loud to the person beside it while dialogue feels weak from the far chair.
Two smaller speakers near the screen edges, aimed back toward the seats, usually work better than one loud speaker behind the audience.
A practical height target is around seated ear level, often 36 to 48 inches from the ground. The speakers should be wide enough to cover the row but not so wide that the outer chairs hear mostly one side.
If voices sound thin after the first 15 minutes, turning the volume up is usually the wrong fix. Re-aiming the speakers is more likely to help.
For more detailed sound-zone planning, Outdoor Speaker Placement for Backyard Theater expands on speaker width, aim, and outdoor dialogue loss.
Bluetooth speakers have one extra risk
Portable Bluetooth speakers are convenient, but they can create lip-sync delay depending on the projector, streaming device, and speaker connection.
If the picture and dialogue feel slightly out of sync, do not solve it with volume. Try a wired audio connection, a lower-latency speaker mode if available, or a different device connection before rearranging the whole yard.
Also check the fence line. If dialogue is clearer at the property edge than it is in the seating row, the speaker aim is wrong. Small yards can push sound toward neighbors quickly, especially between fences, garages, or close side yards.
Cable Routes
The safest cable route is rarely the shortest one
In a small backyard, the shortest cable route often crosses the worst place: the path between the house and the seats.
That is especially risky after dark, when people are carrying drinks, blankets, plates, or a sleeping child. A route that saves 6 feet of cord can create the most obvious trip point of the night.
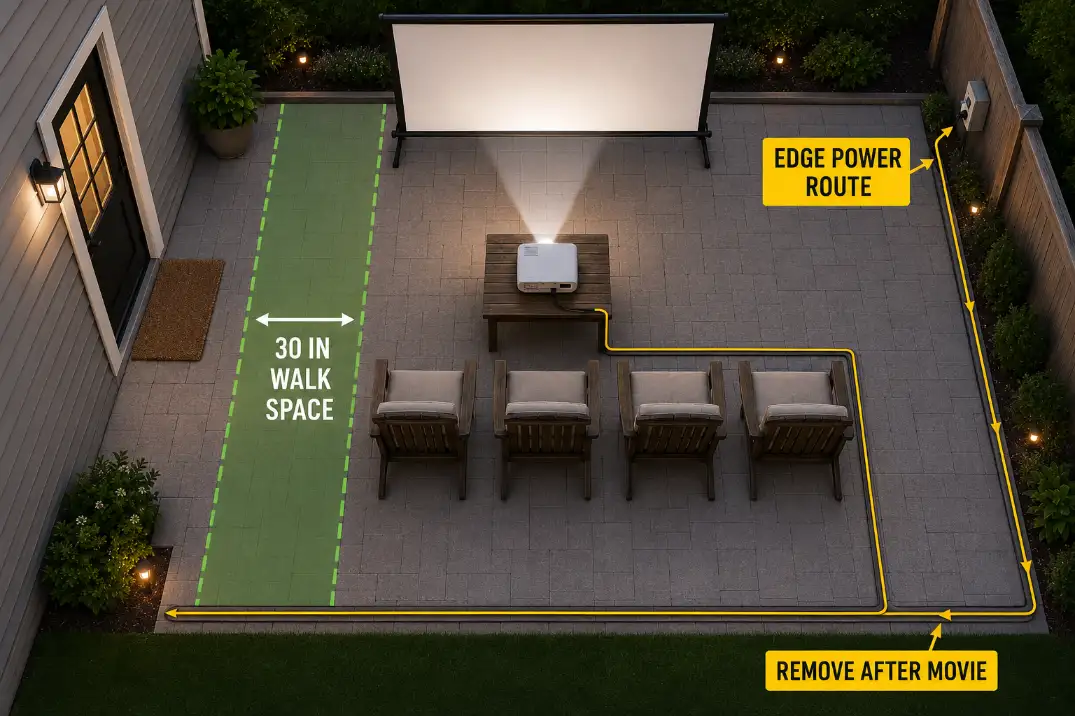
Use the patio edge, fence line, planter edge, or wall side whenever possible. Keep cords away from the door swing, chair legs, and the center of the seating zone.
If a cord must cross a path for one night, it should be visible, temporary, protected, and removed after the movie.
The basic threshold is 30 inches of clear walking space. If the cable route narrows the path below that, change the layout. Do not treat tape, rugs, or furniture as the main safety solution. Those are temporary aids, not a fix for a bad route.
Temporary is not the same as weatherproof
A dry-night temporary setup is different from a recurring outdoor installation. Temporary cords should not become season-long wiring just because they worked for three weekends.
Do not run cords under rugs, through door gaps, across damp mulch, or through low spots where water collects after rain.
For recurring setups, the cable plan deserves its own decision. Weatherproof Cable Management for Outdoor AV is the better next step when the setup is no longer just a one-night arrangement.
Space-Saving Layout
Build the movie zone from the path inward
The best compact movie layouts start with the walking path, not the decor. First mark the route from the back door to the seats. Then choose the screen wall or screen edge.
After that, place the projector where the beam can reach the screen without crossing normal movement. Speakers and side tables come last.
A weak small-yard setup scatters pieces wherever they fit individually: projector on one side, speaker behind the seats, cooler in the walkway, screen against the only gate, and cables crossing the route. Nothing looks terrible alone, but the whole system feels cramped once people arrive.
Snacks, string lights, blankets, and bug control can make the night more comfortable, but they should come after the layout works.
In a small backyard, cozy details cannot rescue a screen that is too close, a projector that blocks the path, or a cord route people step over in the dark.
Three layouts that usually work better
The simplest layout is the fence-screen row: screen along the far fence or wall, one seating row facing it, projector centered behind or just in front of the seats, and cords routed around the edge. This works when the yard has at least 8 to 12 feet of usable depth.
A patio-edge layout works when the screen sits at the far side of the patio and the projector table stays close to the house-side edge without blocking the door. This keeps equipment compact but requires careful beam testing.
A garage-wall layout can work if the driveway or side patio gives you a flat projection surface and enough distance. The danger is glare from garage lights, uneven door panels, or a cable route that crosses the main walking line.
If you are deciding whether this should stay temporary or become a fixed setup, Portable vs Permanent Backyard Theater is worth checking before drilling mounts or committing to a permanent screen location.
Quick Setup Checklist
Use this before the first real movie night:
- Measure real viewing distance from screen surface to seated eye position.
- Use 72–90 inches if the first row is only about 7–10 feet away.
- Keep about 30 inches of clear walking space from the door to the seats.
- Run a 10-minute beam-path test before guests arrive.
- Aim speakers into the seating row, not toward the fence.
- Keep temporary cords along edges and remove them after the movie.
- Reduce screen size before buying a brighter projector if the setup feels cramped.
When the Standard Fix Stops Working
Bigger gear can make a small yard worse
The normal upgrade path is bigger screen, brighter projector, louder speaker, more permanent mounting. In a small backyard, that path often makes the setup worse.
Bigger screens shorten the usable seating zone. Brighter projectors do not fix bad placement. Louder speakers can push sound over the fence without improving dialogue clarity.
The better upgrade is control. Match the screen to the distance. Keep the projector beam out of the movement zone. Aim sound into the seats. Put power on the edge. Those changes improve the night more than oversized gear.
Move the movie zone if the yard refuses the setup
Sometimes the right fix is not a different product. It is a different direction. If one screen location forces the seats too close, puts the projector in the walkway, and sends power across the door path, that part of the yard is not a good movie zone.
Try rotating the setup 90 degrees, using a smaller screen, moving from lawn to patio edge, or shifting the screen away from the gate. A smaller image that works smoothly for 2 hours is better than a larger image that creates problems every 10 minutes.
Final Takeaway
A small backyard movie night does not need a miniature version of a full outdoor theater. It needs a tighter setup logic. Screen size should follow viewing distance. Projector placement should protect the beam path and walking route. Speakers should cover the seating row instead of the fence. Cables should stay on the edge and disappear after the movie.
When those pieces are right, the yard feels intentional instead of crowded. The setup may look simpler, but it watches better.
For broader home electrical safety guidance, see ESFI extension cord safety tips.