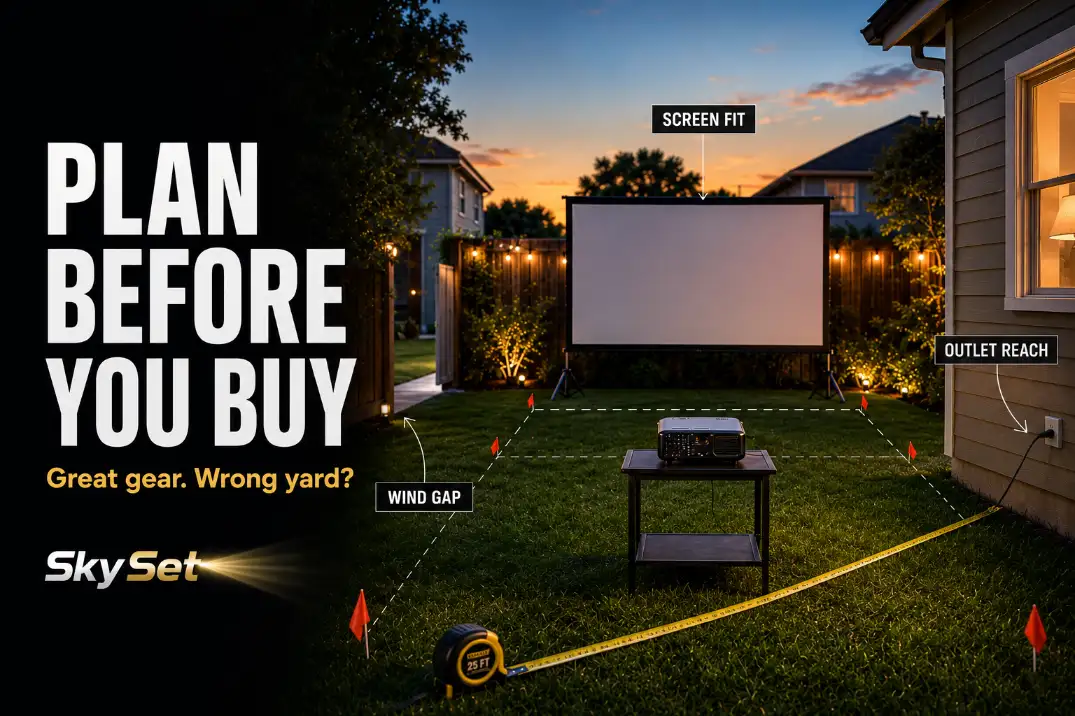
A backyard theater purchase usually goes wrong before the projector arrives. The expensive mistake is not always buying weak gear; it is buying gear before the yard has been tested.
A 120-inch screen can be too large for a shallow patio. A bright projector can still look dull if a porch light grazes the screen. A powerful speaker can still annoy neighbors if it fires past the seating area.
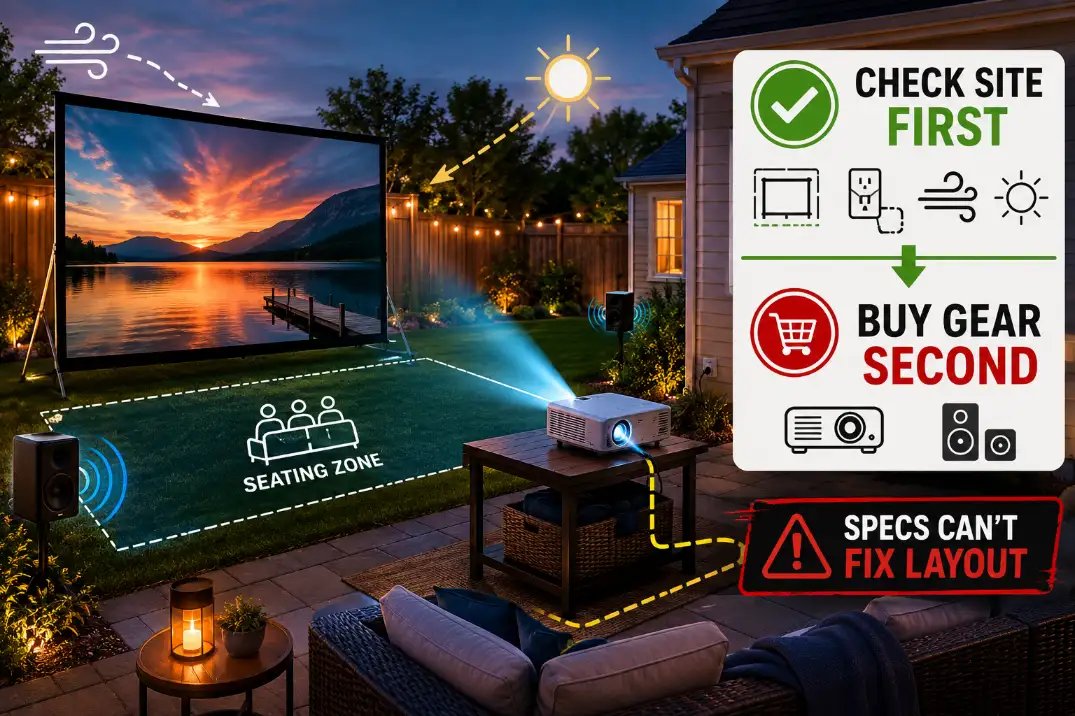
Before you shop, check the yard in this order: screen fit, outlet route, wind exposure, ambient light, sound direction, and only then the gear list.
A useful planning pass takes about 20–30 minutes. It should include at least one real movie-time check, ideally 30–45 minutes after sunset, because that is when light, wind, and walking routes start behaving differently than they did in daylight.
The safest buying order is screen fit first, power route second, wind and light third, sound direction fourth, and gear selection last.
This checklist is not meant to make the setup complicated. It is meant to keep you from using expensive gear to compensate for a layout problem.
Quick Buy-or-Wait Checklist
Use this before comparing projectors, screens, or speaker kits.
| Planning Check | Buy Signal | Wait Signal |
|---|---|---|
| Screen fit | Screen has 2–3 feet clear on each side | Screen crowds plants, fence, grill, or walkway |
| Seating depth | Seats land about 1.5–2.5× screen width away | Viewers must sit too close or too far back |
| Outlet route | Cord can hug a wall, fence, or patio edge | Cord crosses the main walking path |
| Wind exposure | Screen sits near a calmer wall or protected side | Screen location faces an open wind gap |
| Ambient light | Screen surface stays dark after nearby lights are tested | One light washes the screen face |
| Sound direction | Speakers aim into the seating zone | Sound travels past seats toward neighbors |
The buying gate
If those checks pass, equipment comparison becomes useful. That is when a buying-focused guide like Best Backyard Movie Setup can help you choose the projector, screen, sound, and cable pieces that match the yard you just measured.
If one of those checks fails, wait. A better projector, larger screen, heavier stand, or louder speaker may not solve the real problem. It may simply force the same bad layout to cost more.
Measure the Yard
The first scene is simple: stand where the screen would go and measure the space the theater can actually use. Not the whole yard. Not the widest fence-to-fence distance. The usable theater footprint.
Measure the screen zone, not the open lawn
A screen needs more than its visible image area. A portable frame, side legs, tie-downs, plants, furniture, and walking space all reduce the usable width.
If the screen itself is about 9 feet wide, the practical screen zone may need closer to 13 feet once you leave 2 feet or more on both sides.
This is where people commonly overestimate the yard. They measure the open lawn and forget the grill, fence corner, raised bed, fire pit, patio step, or side gate that sits inside the real setup zone.
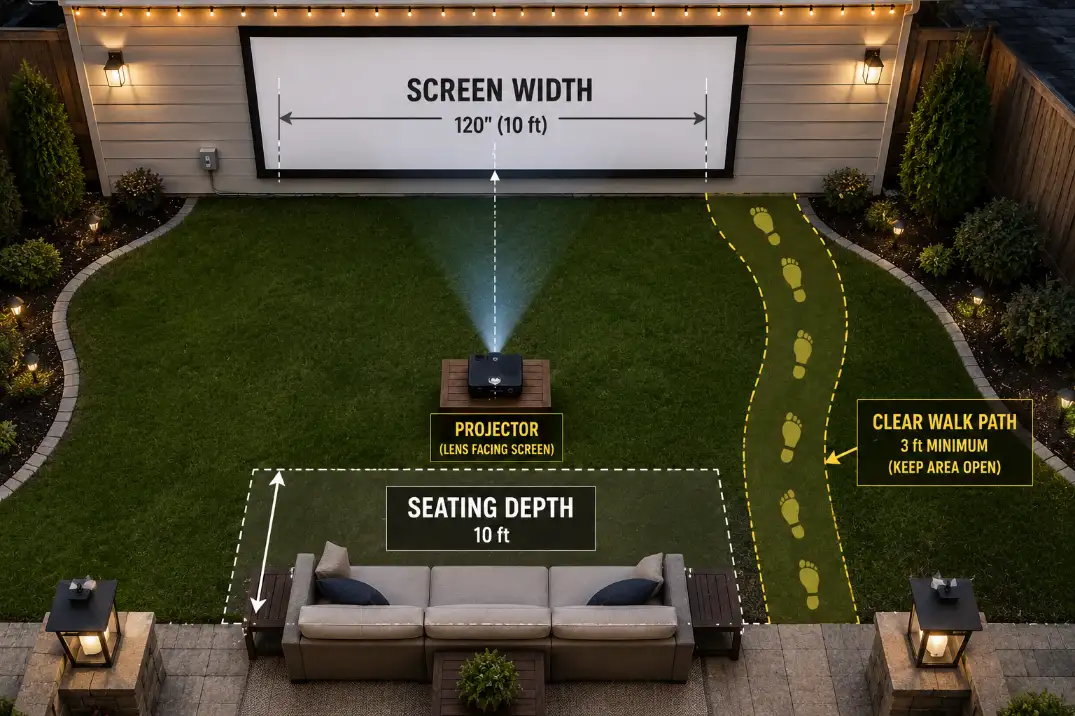
Let seating depth control screen size
Screen size should match viewing depth. For casual backyard movie viewing, the main seats often feel best about 1.5–2.5 times the screen width away. An 8-foot-wide screen usually wants the primary seating area roughly 12–20 feet back.
If the patio only gives you 10–12 feet from screen to chairs, a smaller screen may look better than a larger one. Bigger feels cinematic only when the viewer has enough distance to take in the image comfortably.
For tight yards, the screen decision often becomes a layout decision before it becomes a projector decision.
If depth is your main limitation, Small Backyard Movie Setup gives a better frame for choosing size, seating, and placement in compact spaces.
Keep the walking route visible
Leave about 30 inches of clear passage from the back door to the seating area, snack table, bathroom route, or side gate.
This number matters more after dark than it does during setup. People carrying drinks, kids moving between blankets, and someone stepping around a projector table need a real route, not leftover space.
Setup Note: Mark the screen width, front row, projector table, and main route with painter’s tape, lawn flags, or spare chairs before buying. If the route feels tight in a dry run, it will feel worse during the movie.
Check the Outlet
An outdoor outlet does not automatically mean the power plan is solved. Power is solved only when the cord route is safe, visible, and short enough to behave predictably.
Measure the route the cord will actually take
The wrong measurement is a straight line from outlet to projector. The useful measurement follows the real edge route: along the wall, around the patio, behind seating, or beside the fence.
A projector that sits 18 feet from the outlet may need a 25-foot cord if the cable avoids the walking route. That is normal. What is not normal is forcing the cable through the center of the seating area because the shorter line looks cleaner on paper.
If the clean route crosses a high-traffic path, fix the layout first. Do not hide the problem under a rug, chair, blanket, or dark corner. A hidden trip hazard is worse than a visible one.
Know when more cable stops helping
One outdoor-rated extension cord along a protected edge can be manageable. Multiple connected cords, a route through wet grass, or a cord crossing the door path is a warning sign that the projector table, screen, or seating position needs to move.
This is the point where a routine fix stops making sense. Buying a longer cord may technically reach the projector, but it may also lock the whole theater into the wrong part of the yard.
For a deeper power-route check, use Backyard Projector Power Setup and Cable Hazards before deciding where the projector table belongs.
Map the Wind
Wind is often underestimated because people think of it as a storm problem. For backyard theater, it is usually an ordinary evening airflow problem.
Watch the screen location at movie time
Do not judge wind at noon if the movie starts at 8:30 p.m. Many yards change after sunset as patios cool, fences redirect air, and open side yards start pulling breeze through the space.
Stand where the screen would sit for 10 minutes. Watch tree leaves, hanging string lights, umbrella fabric, grill covers, and tall plants. If soft items move every few seconds, a fabric screen will probably move too.
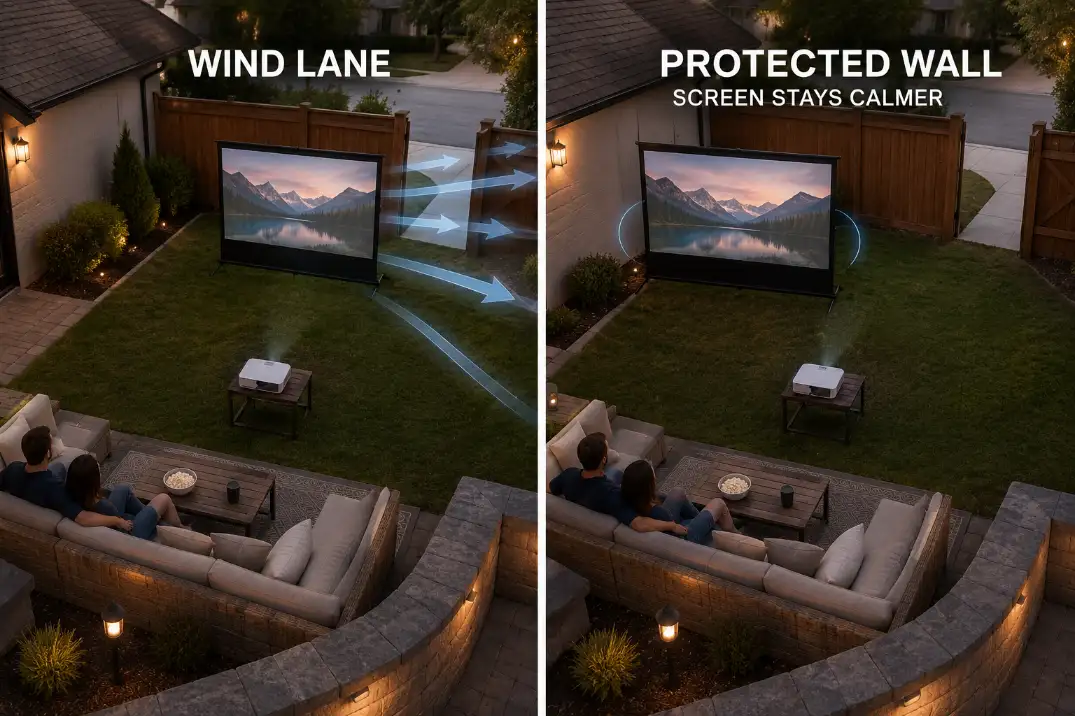
Treat the screen like a sail
A portable screen facing a driveway gap, side-yard opening, unfenced slope, or long open lawn catches more air than people expect. If the screen has to be heavily weighted just to stay calm on a normal evening, the location is already marginal.
The first fix is not always heavier weights. Often the smarter fix is rotating the setup 90 degrees, moving closer to a protected wall, or choosing a smaller screen that catches less wind.
Weights help after the location makes sense; they should not be used to rescue a bad wind lane.
If a screen needs heavy weighting on a normal calm evening, the location is the problem, not the accessory list.
Test Ambient Light
Ambient light changes what projector brightness means. This is where many buyers overvalue specs and undervalue the actual screen surface.
Test the screen, not just the yard
A yard can feel dim while the screen itself is still being hit by light. That difference matters. The symptom is a pale, flat image. The mechanism is contrast loss on the screen surface.
Check the planned screen location 30–45 minutes after sunset. Turn on the porch light, kitchen light, garage light, side-yard light, and any string lights you normally use. Then look at the screen area from the seating position.
If one light grazes the screen face, the image may look washed out even with a decent projector. If the surroundings are softly lit but the screen stays dark, the setup may still work well.
Control light before buying brightness
A brighter projector can help with general dusk conditions. It cannot fully fix direct light landing on the screen. That is why turning off, shielding, redirecting, or relocating one light source can outperform buying more brightness.
This is a common buying trap: the reader sees weak contrast and assumes the projector is the problem. Sometimes it is. More often, the first question should be whether the screen is receiving unwanted light.
If brightness is still the real limitation after the light test, Outdoor Projector Brightness can help connect lumen expectations to actual outdoor viewing conditions.
Plan Sound Direction
Sound outdoors behaves differently because the yard does not give you the same wall reflections as a room. Weak dialogue is not always a speaker-size diagnosis. It is often a placement symptom.
Aim sound into the seating zone
Speakers should serve the people, not the entire yard. If speakers sit beside the screen and fire across open space, dialogue may feel thin in the back row. If they sit too far behind the audience, volume often rises until it spills toward neighbors.
Moving speakers 6–10 feet closer to the seating zone can matter more than turning them up. The goal is not maximum loudness. The goal is clear dialogue at a volume that does not make the rest of the yard part of the theater.
Check what sits behind the audience
Sound keeps traveling after it passes the seating area. A side fence, neighboring bedroom window, narrow driveway gap, or open back corner can become the real volume limit.
This is where more speaker power can waste money. If sound is aimed past the audience, a louder speaker just sends the same problem farther.
Fix direction first. Upgrade output only after the seating zone is actually being served.
For placement choices near the screen, beside the seating area, or along a side edge, Outdoor Speaker Placement for Backyard Theater is the better next step.
List the Gear
The gear list should come last because every item should answer a condition you have already checked. Otherwise, the list becomes a wish list instead of a plan.
Buy for the measured layout
A practical backyard theater list may include a projector, screen, speaker system, media source, outdoor-rated power route, table or stand, seating, low path lighting, cable protection, and a weather plan. But those items are not equal.
Screen fit comes before projector choice. Outlet route comes before table placement. Wind comes before screen size. Ambient light comes before brightness expectations. Sound direction comes before speaker power.
Do not buy the projector first if the screen location is still uncertain. Screen width affects viewing distance, throw distance, cord path, brightness needs, and seating layout.
A projector bought too early may still work, but it can force the whole setup into the wrong part of the yard.
Avoid buying around a false problem
Some upgrades solve the wrong issue.
A larger screen will not fix a shallow yard. A brighter projector will not fix a porch light washing the screen. Heavier screen weights will not make an exposed wind lane pleasant.
A louder speaker will not fix sound aimed past the seating area. A longer cord will not make a bad walking route safe.
The better purchase order is simple: confirm screen placement, confirm power route, check wind, test light, aim sound, then buy gear. Accessories should support the plan, not rescue it.
Final Check Before Buying
Do one no-equipment rehearsal before placing the order. Put chairs where people will sit. Mark the screen width. Set a small table where the projector would go.
Walk from the back door to the seats after dark. Turn nearby lights on and off. Watch the screen location for 10 minutes of evening wind.
If the layout still works after that, the gear decision becomes much cleaner. If the setup feels cramped, bright, windy, or awkward before anything is installed, better equipment will probably not fix the underlying problem.
For outdoor electrical safety around temporary cords and exterior power use, see the Electrical Safety Foundation International.