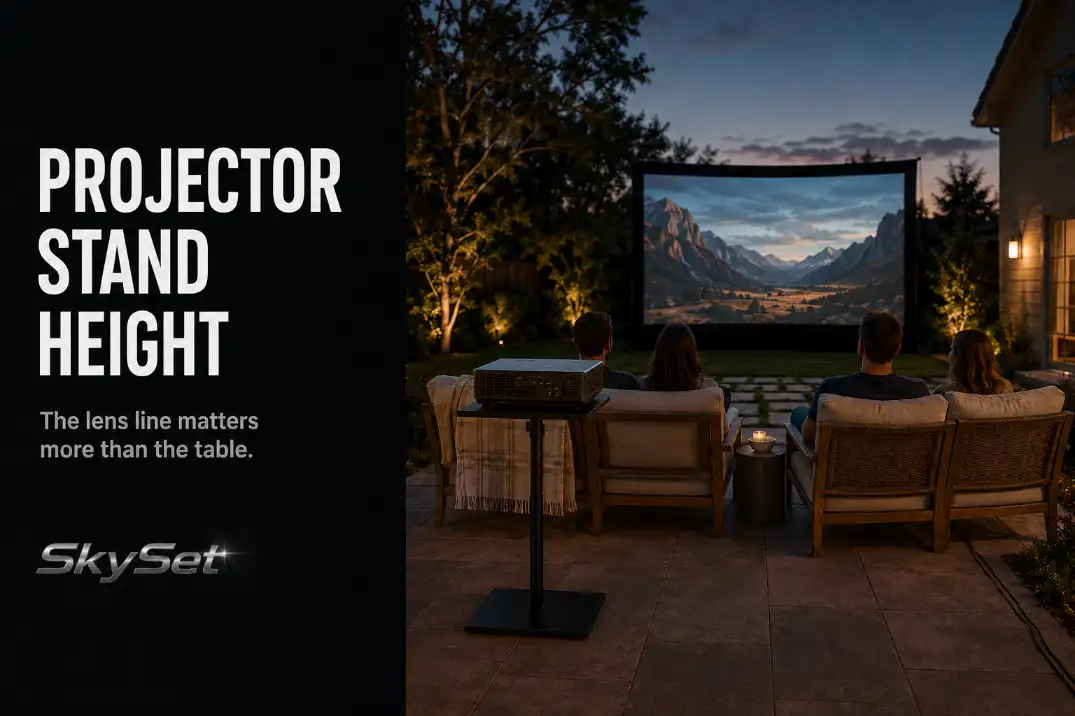
The right projector stand height is not a standard table measurement. It is the height that lets the lens follow its natural image path while the projector remains level, the picture lands inside the usable screen area, and routine movement stays outside the beam.
That relationship changes from one yard to another. The screen may sit higher to preserve viewing comfort, the projector may cast most of its image above its lens line, or the final seating layout may place heads directly in the beam. Measuring only the tabletop ignores all three conditions.
Lifting the projector is not an automatic solution. More height may clear a viewer’s head, but it can also force the projector to tilt, increase digital keystone correction, and make a narrow stand easier to disturb.
Start with the lowest stable height that produces a naturally aligned image. Then test that position with the screen, chairs, walking route, and projected image all in their final locations.
Lens Height vs Screen Center
Measure stand height through the center of the projector lens, not through the tabletop or the top of the projector case. The lens may sit high or low within the casing, so two projectors placed on the same table can produce different lens heights.
The screen also needs a more precise reference than its complete frame. Identify the usable image rectangle—the area where the picture should actually appear. Borders, support legs, unused fabric, and ground clearance can make the physical screen center different from the center of the projected image area.
A projector lens does not always belong level with that image center. Many table-oriented projectors naturally cast most of the picture above the lens line. Other designs have a different fixed offset, while projectors with optical lens shift offer additional vertical flexibility.
Layout Check: Begin with the projector level and observe where its uncorrected image lands. The stand should support the projector’s natural image path, not force the lens to point at the exact center of the screen.
Use the projector manual to confirm model-specific offset or lens-shift behavior. Do not transfer an offset percentage or mounting diagram from a different projector and treat it as a universal placement rule.
Screen position and lens height still affect each other. If the usable image begins unusually high, a conventional table may leave the projector aiming sharply upward. Establishing a comfortable outdoor movie screen height first prevents the stand from being used to rescue a screen-position problem.
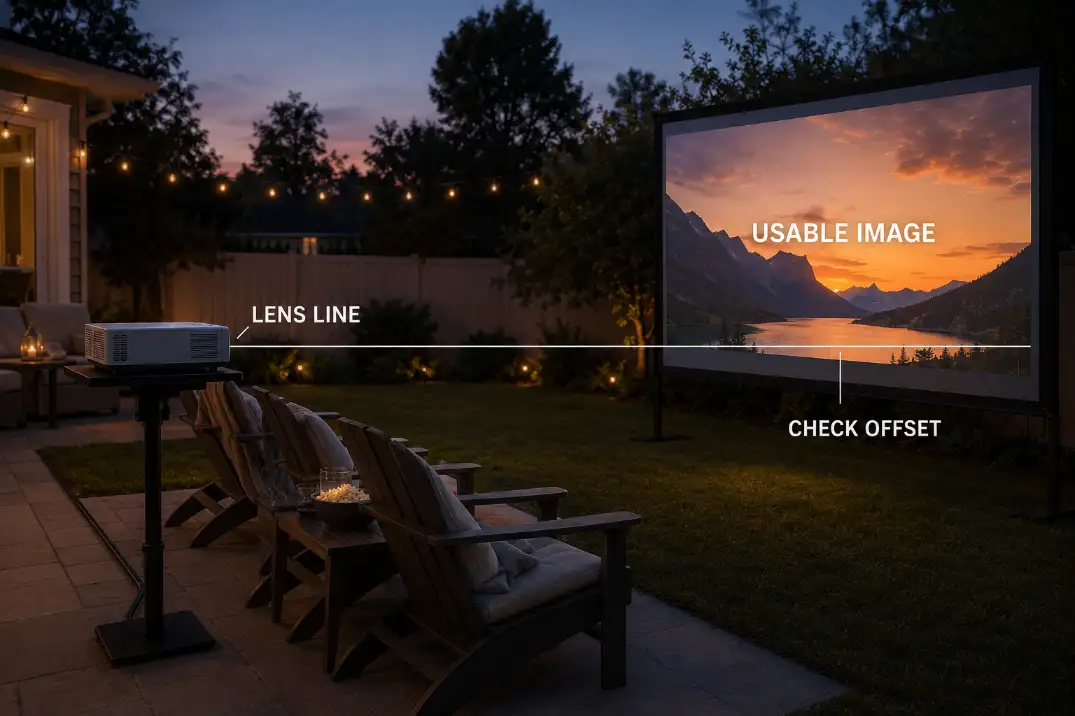
Place the level projector at its intended throw location and display an image before changing the stand. If the picture lands close to the usable screen area, make small physical adjustments from that starting point. If it lands far above or below, verify the screen position and the projector’s installation guidance before adding tilt.
Table Height Mistakes
Reject a table height when it solves only the support problem but creates a new image or movement problem. A flat household table may hold the projector securely, yet its lens can still sit too high, too low, or directly behind a viewer’s head.
One common mistake is selecting the table before setting the screen. The screen then ends up higher than expected, and boxes, books, or loose shims are added beneath the projector. The extra height may improve the image position temporarily, but it creates a movable base where precise alignment matters most.
The opposite mistake is choosing a tall stand solely to put the beam above everyone. That can work when the projector remains level and the stand stays outside the traffic route. It fails when the raised lens must point down toward the screen or the narrow support becomes easy to bump.
Moving the projector behind the seating area is often a stronger adjustment than adding height. The longer separation from the nearest heads can clear the beam while allowing the unit to remain lower and more stable.
Test the table with the final chairs in place. An empty patio makes almost any support position look workable. Once chairs move back, viewers sit upright, and someone walks between the house and seating area, the actual conflict becomes visible.
The projector must also fit completely on the supporting surface. Do not allow a foot or corner to overhang simply to gain a better lens position, and do not crowd the vents against improvised side supports.
Keystone Pressure From Bad Height
Treat obvious trapezoid distortion as evidence that the physical height needs another look. When a level projector is square to the screen, the image should retain reasonably parallel edges. Tilting the projector sharply upward or downward makes one horizontal edge appear wider than the other.
Digital keystone correction can restore a rectangular shape, but it does not correct the physical relationship. It remaps the picture within part of the projector’s imaging area, which can reduce the usable image size or effective detail and introduce artifacts around fine edges.
A small finishing adjustment is different from using keystone to rescue the stand height. If the uncorrected picture has a dramatically wider top or bottom edge, return to the physical setup before increasing correction.
Level the projector again, check its horizontal centerline, and determine whether the stand or screen can move. Apply restrained digital correction only after the physical relationship is as clean as the yard permits.
Temporary outdoor setups do not require installation-grade geometry. The practical failure boundary is reached when each correction creates another compromise: added height requires more tilt, more tilt requires heavier keystone correction, and the corrected image no longer fills the intended screen area cleanly.
The wider outdoor projector placement problems become relevant when height changes cannot resolve both the image angle and the available throw position.
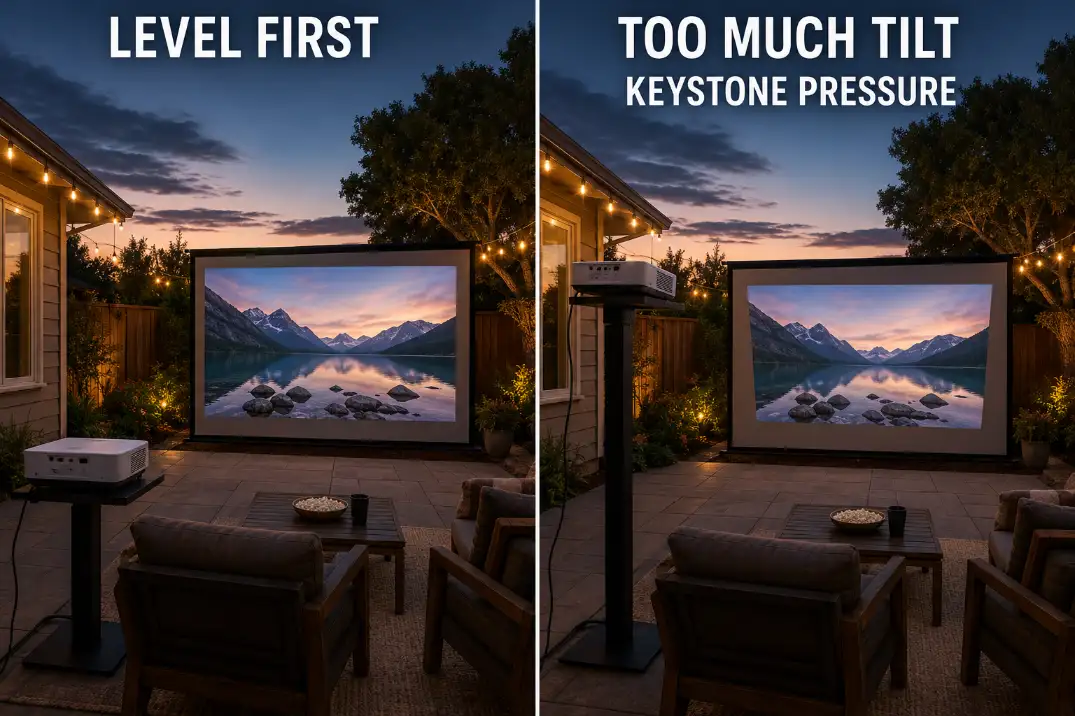
A workable stand height lets the projector remain close to level, places the picture within the usable screen area, and requires no more than minor finishing correction. If a small physical height adjustment noticeably improves the uncorrected rectangle, make that adjustment before relying on another digital setting.
People Crossing the Beam
Approve the stand height only after testing the occupied yard. The beam is a three-dimensional path that widens as it approaches the screen, so a person may clear it near the projector yet cast a large shadow when crossing farther forward.
Place the actual chairs and check seated head positions rather than chair-back height. Upright adults, children moving between seats, and guests standing to leave all occupy more vertical space than empty furniture suggests.
The cleanest arrangement usually keeps the projector behind the primary seating zone and preserves a walking route along one side. This reduces both seated-head interference and repeated crossings without forcing the projector onto an excessively tall support.
Raising the projector should remain a secondary adjustment. First determine whether moving the stand farther behind the seating or shifting the access route produces a cleaner beam path. Extra height is useful only when it clears the obstruction without adding tilt or instability.
The same real-use check used for outdoor movie seating layouts applies here: evaluate the arrangement while people enter, sit, stand, and leave—not as a static plan.
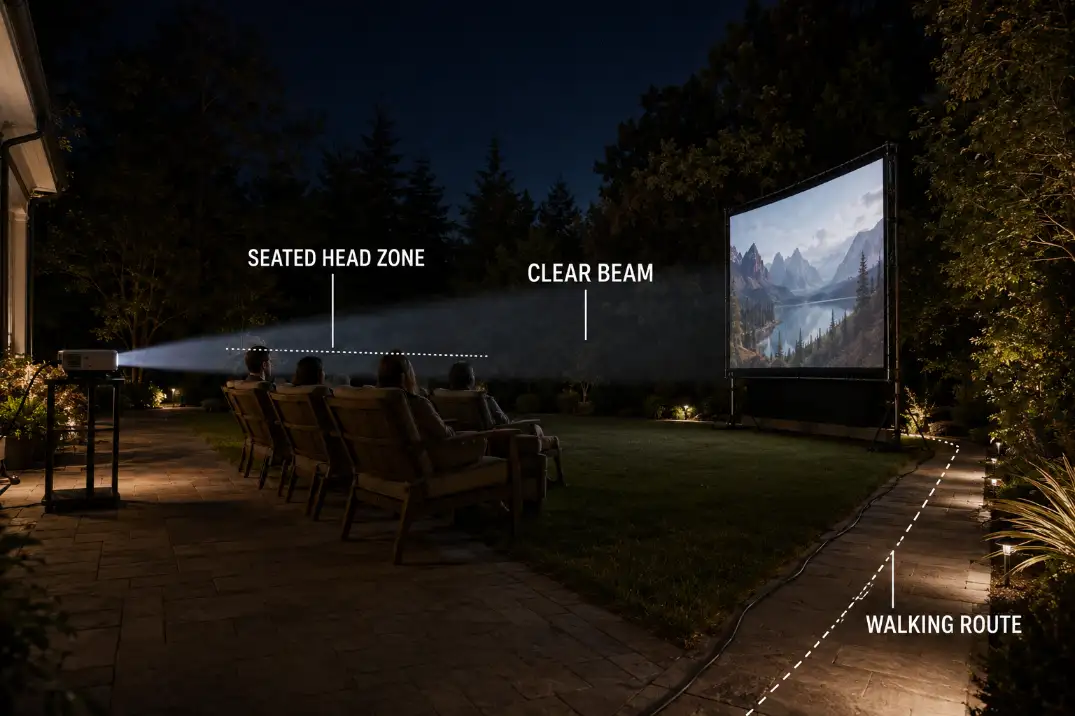
Walk the normal route with the test image running. Include trips to the house, access to snacks, movement around the outer chairs, and late arrivals. A height that works only while everyone remains seated has not passed the layout test.
Stand Stability on Patio or Grass
Do not accept an optically correct height if the supporting surface cannot hold it. Raising the projector increases leverage, so small movements at the stand feet can produce visible changes at the screen.
A patio provides a firm base, but it may still slope for drainage or contain uneven pavers, expansion joints, and rocking slabs. Set all stand feet on the same stable plane where possible. A foot balanced on a joint or near a paving edge can shift after focus and alignment are complete.
Grass creates a slower failure. Stand feet can compress the soil unevenly, particularly after watering or rain. The projector may begin level and gradually tilt as one side settles.
A broad, rigid platform beneath the complete stand footprint can distribute the load, but it must sit flat without rocking. Loose objects placed beneath individual legs are not dependable leveling devices; a cable tug or minor contact can release them.
Keep power and signal cables from pulling against the stand. Give the connector area enough slack, then route cables toward the perimeter rather than across the walking line. The complete route is a separate outdoor AV cable-planning decision, but the stand must remain stable before those cables are finalized.
On grass, allow the loaded stand to settle and then repeat the level and image check. Soil moisture, equipment weight, and stand footprint vary too much for one universal waiting period. If the image position continues to drift, the surface is not yet dependable.
Image Alignment Test
The useful test is not whether the projector looks straight on its stand. It is whether the complete setup preserves image geometry, beam clearance, and stability at the same time.
- Set the usable screen area. Install the screen at its intended viewing height and tension it enough to reveal the true image boundaries.
- Place the stand at the intended throw position. Use a firm, level surface and position the projector square to the screen with its lens facing the screen centerline.
- Level the projector and display a test pattern. Use the built-in grid or another clearly rectangular image. Observe where it lands before applying digital correction.
- Adjust physical height in small increments. Check all four image edges rather than judging only the center. Stop raising the projector if additional height creates obvious tilt, wobble, or a new obstruction.
- Add the chairs and test movement. Sit in the tallest likely viewing positions and walk the normal route between the house, seating area, and yard while the image remains projected.
- Make the finishing adjustments. Recheck the rectangle, focus, beam clearance, and stand stability. Apply restrained keystone correction if needed, then finalize the cable route.
Repeat the image-edge check after a grass-supported stand has carried the projector for a while. A drifting top edge or one gradually lowering side can reveal settlement before movement becomes obvious at the stand.
The correct height is the lowest stable position that lets the projector remain close to level, places the image naturally within the usable screen area, and keeps predictable movement outside the beam. Once those conditions hold together, further height usually adds risk rather than improving the layout.
For additional technical context, see ProjectorCentral’s explanation of lens offset, lens shift, and digital keystone correction.