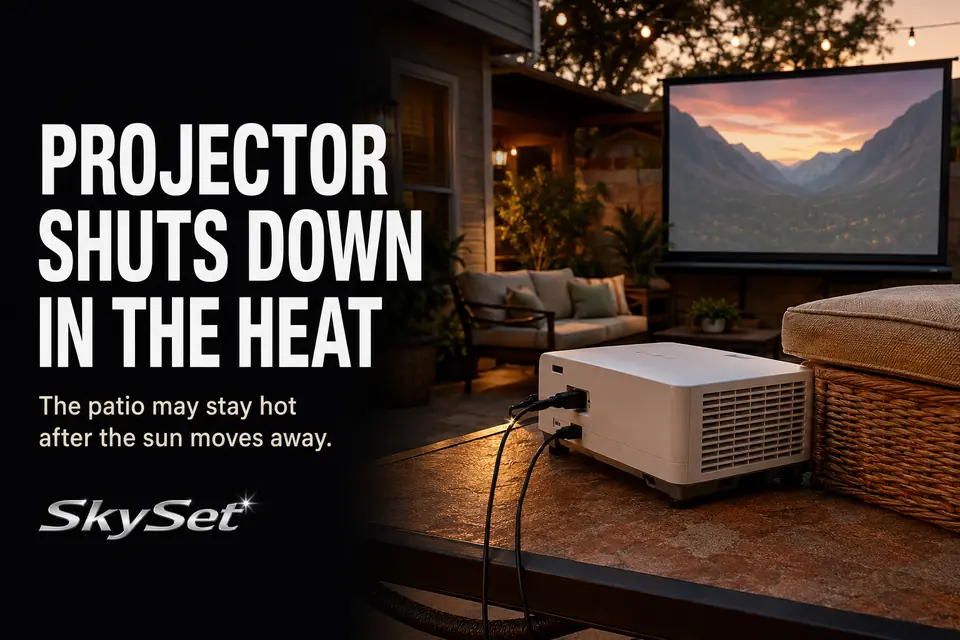
An outdoor projector can start a summer movie normally, run with an increasingly loud fan, and then dim, interrupt the picture, or shut down. The easy assumption is that the projector cannot be overheating because the evening air already feels cooler. That comparison measures the wrong thing.
What controls the diagnosis is the temperature of the air reaching the intake after the patio, table, enclosure, and projector casing have spent hours absorbing heat. Add restricted exhaust, and the projector may begin recycling its own hot air even as the rest of the yard cools.
A warm casing is not enough to prove overheating; projectors normally discharge noticeable heat. The useful first check is the complete cooling route: where intake air comes from, what has warmed it, where exhaust goes, and whether that exhaust can escape.
A projector that works indoors but fails outside under summer conditions often has a setup-related heat problem. Repeated thermal warnings in an open, shaded, properly ventilated position point beyond placement toward a dirty serviceable filter, an internal fault, or a model-specific operating limit.
Hot Patio Surfaces
Test the supporting surface before blaming the projector. Concrete, stone pavers, composite decking, and metal furniture can remain hot well after direct sun has left the yard, creating a much warmer operating pocket than the evening air reading suggests.
The surface can load the projector with heat in two ways. It radiates stored heat toward the casing and warms the air entering low-mounted intake vents. A projector drawing air from the narrow space above a heat-soaked patio has less cooling capacity available for the heat generated internally.
Before installing the equipment, compare the intended surface with a nearby area that remained shaded. Use the back of your hand on the unoccupied surface; do not touch the projector’s exhaust area while it is operating. A clear difference does not prove that the patio is the only cause, but it identifies a heat source that should be removed during testing.
A stable stand can separate the projector from a hot patio, but height alone is not a cooling fix. The platform must remain level, resist movement, and leave every required vent unobstructed. The guide to projector stand height for backyard movies covers that placement decision without treating extra height as a substitute for airflow.
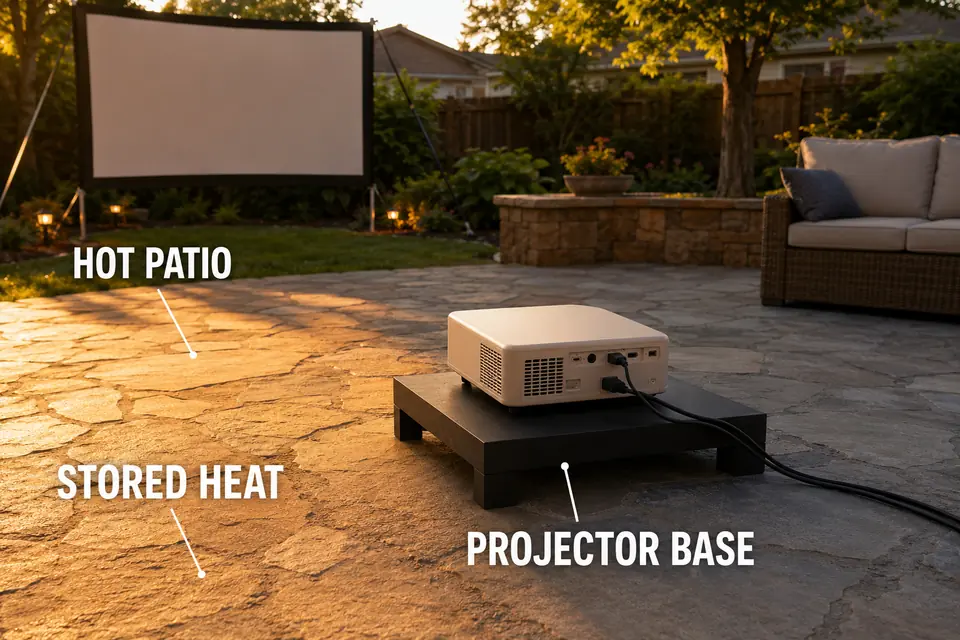
If the projector behaves normally on a cooler, shaded surface, the original base was contributing heat. It may not have been the only cause: surface heat becomes more damaging when vent clearance is limited or an enclosure holds exhaust around the projector.
Blocked Projector Vents
Clear-looking sides do not necessarily mean clear airflow. Some vents draw air into the projector while others discharge heated air, and their locations vary by model. Identify both routes in the official manual rather than assuming the rear panel is the only area that matters.
A wall, screen support, storage case, speaker, power adapter, or decorative object can sit too close to an exhaust. A tablecloth may shift toward an intake. Loose paper can be pulled against a low opening only after the cooling fan starts, hiding a restriction that was not present during setup.
Judge the route, not just the visible vent face. Intake air needs an open approach, while exhaust needs room to disperse without striking a nearby panel and curling back toward the intake. Increasing clearance on an unrelated side will not correct exhaust recirculation.
Sustained high fan speed can support the diagnosis when it escalates during the movie and is followed by dimming, a warning, or interruption. It is not proof by itself; projector fans also respond to normal internal temperature changes, and some models are naturally conspicuous during quiet scenes. Use the separate guide to outdoor projector fan noise when sound is the main complaint rather than one part of a thermal pattern.
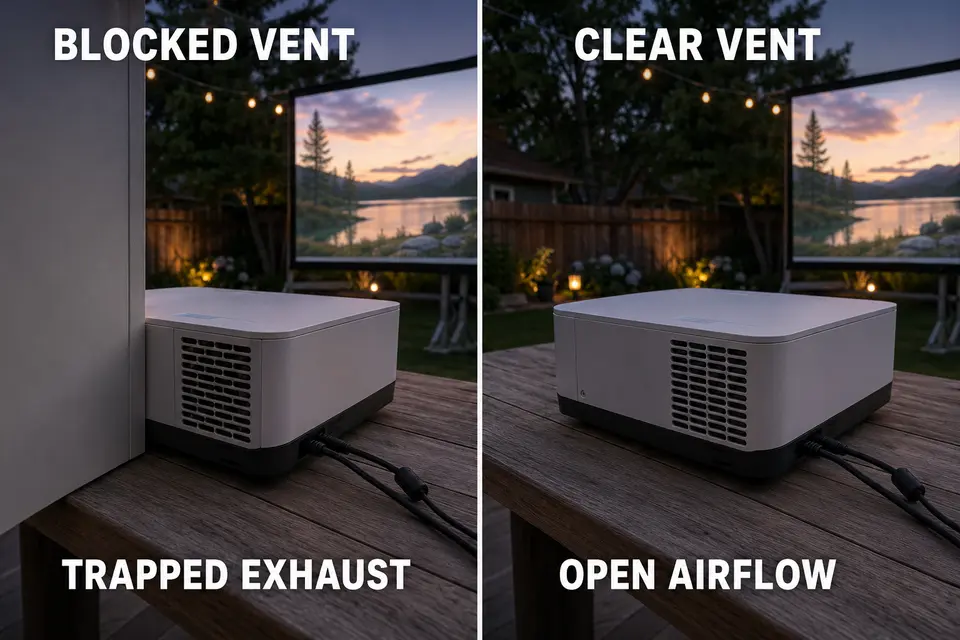
Do not invent a universal clearance such as 6 or 12 inches. A compact portable projector and a high-output home theater model may require different spacing. Follow the instructions for the exact projector, including any special clearance around rear, side, or bottom vents.
Enclosures With Poor Airflow
An enclosure fails when it gives hot exhaust no path out, even if every projector vent remains visibly uncovered. The air around the entire unit gradually warms until the intake begins drawing back the heat the projector just expelled.
One open face does not guarantee crossflow. A deep box can retain a hot pocket at the rear or beside the exhaust, while a weather cover may narrow the opening further after it shifts. An enclosure that feels open from the front can still behave like a heat trap around the projector.
A small fan is not automatically the answer. If it only circulates air inside the same confined space, it redistributes the heat instead of removing it. Useful enclosure ventilation needs a defined cooler-air entry and a separate warm-air exit that does not feed the projector’s intake.
Weather protection and cooling therefore cannot be solved independently. Guidance for protecting an outdoor projector from dew can help manage moisture, but no rain or dew cover should seal an operating projector inside a poorly ventilated container.
For diagnosis, remove nonessential panels or covers and test the projector in a dry, open, shaded position that still meets its installation requirements. If the symptoms disappear, trapped or recirculated air was contributing. If rain, condensation, or unstable weather is possible, reschedule the test rather than leaving the equipment exposed.
Direct Sun Before Movie Time
Do not use sunset as the projector’s cooling start time. A unit left on the patio through late-afternoon sun can begin the movie already heat-soaked, along with its table, power adapter, enclosure panels, and supporting surface.
This explains why a projector may fail even though the yard feels comfortable by showtime. Moving the equipment into shade immediately before startup changes the current exposure but does not instantly release the heat stored in its casing and surroundings.
Shade the intended projector position in advance without wrapping or closely covering the unit. When practical, keep the projector in a dry indoor or deeply shaded location until the setup area is ready.
The same timing discipline matters after the movie. Let the projector complete any manufacturer-required cooling cycle, disconnect it safely, and move it away from overnight moisture instead of leaving it inside a patio enclosure. A consistent process for outdoor AV gear storage after movie night prevents the cooling correction from becoming a dew or storage problem later.
Heat Shutdown Signs
Diagnose a pattern of escalation, not heat alone. A projector is designed to discharge warm air, so a warm casing or hot exhaust stream can be normal. Rising fan activity followed by a warning, dimming, image interruption, or automatic shutdown is more meaningful.
Read indicator lights and warning sequences through the manual for the exact model. A red light or blinking pattern can represent different conditions across manufacturers. Do not repeatedly restart a projector after a thermal warning; that shortens its cooling period and recreates the same load before the cause has been corrected.
Image interruption by itself is less specific. A loose connection, source-device failure, or streaming dropout can also stop the picture. Heat becomes more likely when the interruption follows rising fan activity, occurs after a similar runtime on hot evenings, or appears with a temperature indicator.
Stop immediately if there is smoke, a burning odor, sparking, damaged wiring, or visible deformation. Disconnect power only when it is safe, keep people away, and do not continue the test. Those signs have crossed from placement diagnosis into an electrical or equipment-service boundary.
If the projector repeatedly reports a thermal condition while clean, shaded, openly ventilated, and operated within its stated limits, layout changes are no longer a sensible substitute for manufacturer support or qualified service.
Cooling Setup Test
The useful test removes the major environmental heat loads together. Run it before guests arrive with familiar content and the picture mode normally used for the movie.
- Keep the projector in a dry indoor or deeply shaded location until the test area is out of direct sun.
- Place it level on a stable, cooler surface with the model-specific clearance around every intake and exhaust.
- Remove nonessential fabric, covers, enclosure panels, cases, and table clutter.
- Run familiar content while watching fan behavior, indicator lights, image stability, and temperature messages.
- Stop if a thermal warning, abnormal odor, image interruption, or protective shutdown returns.
Before committing to the full movie, confirm:
- The projector position remains shaded.
- The supporting surface is no longer holding strong daytime heat.
- Every intake has the required open approach.
- Every exhaust discharges into open space.
- No enclosure panel redirects exhaust toward an intake.
- The official manual is available for model-specific indicators and clearances.
Normal operation under these conditions confirms that the original setup was adding or trapping heat, but changing several conditions together does not isolate one cause. If further diagnosis is needed, reintroduce one safe variable at a time—for example, the original table without the enclosure—and watch for the pattern to return.
Never reintroduce a blocked vent, sealed container, direct sun exposure, or another condition prohibited by the manufacturer. The test should isolate reasonable setup variables, not force another thermal shutdown.
If overheating returns in the fully open arrangement, stop rearranging the patio. Check only the filters or exterior vents the manual identifies as user-serviceable, then contact the manufacturer or an authorized service provider. A projector that cannot remain stable with cooler intake air and an unobstructed exhaust path has moved beyond an outdoor placement problem.
For model-specific ventilation and installation cautions, consult the projector’s manual; these Epson projector safety instructions show why bottom intakes, exhaust clearance, and airtight locations require particular attention.